The Secret Sauce To Dreamy Photos
Welcome to this comprehensive photography guide where I share the secret sauce behind capturing dreamy photos.
This post is designed to help you create beautiful, soft, dream-like images; regardless of your skill level and experience as a photographer.
I’ll go over my entire process; from pre-production through to the final editing of the photos. I’ll share tips about concept planning, lighting, camera settings and editing workflows in hopes of helping you create your very own dreamy photos.
Ready to learn? Let’s get straight into it.
Pre-Production and Planning

The first step to successfully capture dreamy photos is a simple but often overlooked one: Pre-Production and Planning
As a photographer, I find it invaluable to spend the majority of my time planning out the concept and logistics of a photographic project.
I know, I know. As photographers and creatives, we’d rather be out there clicking the shutter and making the art rather than planning it out. However, I cannot emphasize enough the importance of proper pre-production and planning for a number of reasons.
Proper planning creates guidelines.
Creativity doesn’t come from infinite freedom. Creativity is born out of making the most from what you have.
By planning out the specific requirements and logistics of a photoshoot, you create creative and logistical boundaries for yourself that will help you stay focused when it comes to shooting on the day.Intentional pre-production will ensure you get the shots you want and help you focus on the goals of the photoshoot, saving time, money and help keep everyone happy.
It helps you communicate your ideas with others.
“A picture is worth a thousand words”.
One of the biggest reasons I invest my time in the pre-production of a shoot is because it helps me communicate my ideas with others.
By having a mood-board of reference images or notes allows me to easily share my ideas with others without having to repeat myself.
So if you need to explain your ideas to others, whether it be your model or assistant photographer, putting some time in the planning of your project will help you capture those dreamy photos that you desire.It serves as a reference for your production day.
As a photographer, I can be a forgetful person at times. However, most of the time this forgetfulness is caused by external factors on the day of the shoot.
Early mornings, gear checking, changes in weather conditions, having to adapt to a new situation. All of these factors can hamper your ability to clearly remember the specific shots, angles and details of your photoshoot.
Having my ideas written down, either on paper or digitally, helps me remember key aspects of a concept and saves me from having to remember my initial ideas when I’m out there clicking the shutter.
My mood-board for the photoshoot. Includes reference images from Pinterest along with personal notes. Made in Milanote.
2. Camera Settings & Camera Gear
I’m a firm believer that so long as you have the vision, as well as both the technical and artistic skills for photography, gear becomes one of the least important factors when it comes to taking a shot.
Whether it’s the latest mirrorless camera or your phone, if you know what you’re after you can achieve it regardless of the gear.
However, I still find it valuable to talk about some of the tools and settings you may want to use when taking dream-like photos. So here’s how I’ll approach this section:
Firstly, I’ll talk about camera settings that you may want to use and what I used for my particular shoot. Following this, I’ll talk about some of the gear I used in order to achieve these camera settings.
Notice how I use the term, “…may want to use”. This is a guide, not a law. Ultimately, you are the artist behind the lens and what gear/settings you use will be up to you.
So, let’s talk about some settings.
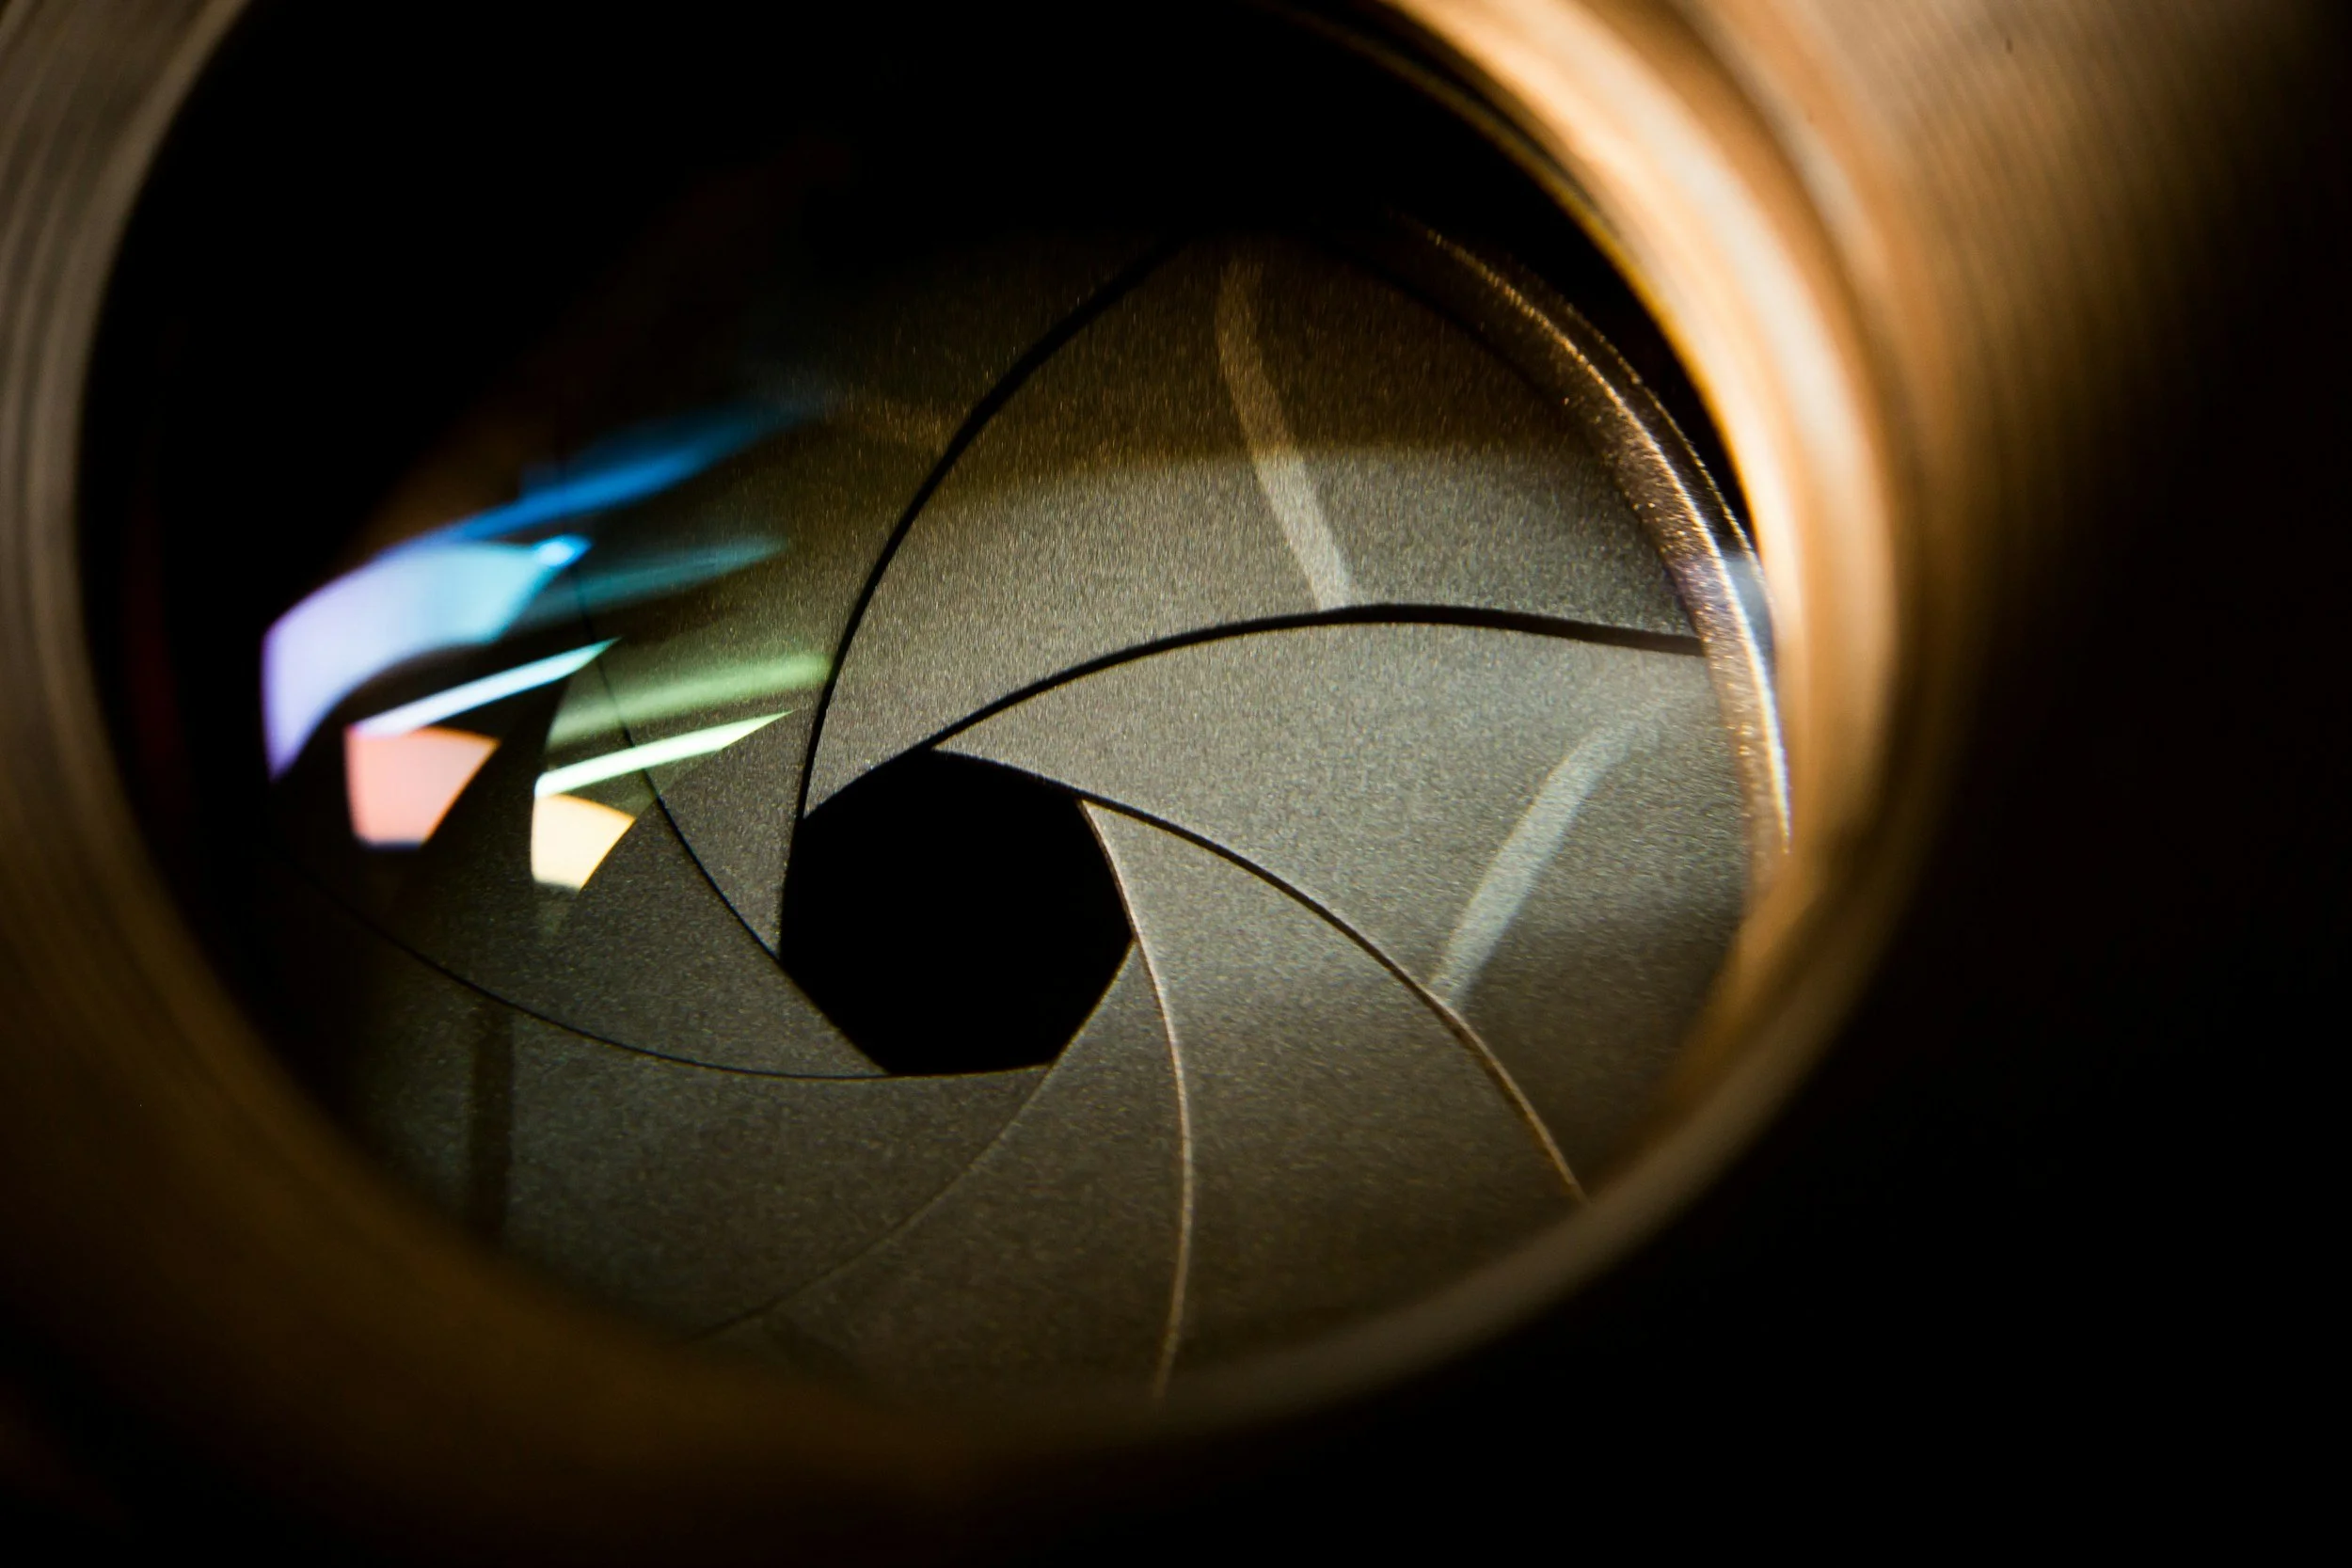
Wide Aperture and Shallow Depth-of-Field
Portrait of Stephanie. Shot at a shallow aperture of f/2.8.
Dreamy photos often convey a sense of gentleness and calm. They feel soft and usually make the viewer feel at ease with a sense of serenity and peace.
This can be achieved by shooting at a wide aperture, achieving a shallow depth-of-field.
By widening up your aperture, you soften and blur the surroundings of your subject. This helps pull the viewer’s focus to a certain element of your composition, softening the rest of your image.
Slow Shutter Speed

Stephanie running through the water. Shot at a “slow” shutter speed of 1/30.
Slow shutter speed photography is a whole genre on it’s own, but when it comes to achieving “dreamy” photos it can really add to the soft and serene feel that dreamy photos are known for.
This is because it adds “motion blur”, which is how we generally see moving objects in real life as well as in cinematic films and media.
I typically shoot anywhere from 1/50 to 1/15 of a shutter speed depending on the amount of motion blur I want.
This combined with a shallow depth of field creates a very soft image and can even make the photos feel “cinematic” or “ethereal”.
From these settings, we can figure out what kind of gear we “need” in order to achieve the results we’re looking for.
Fast Lens
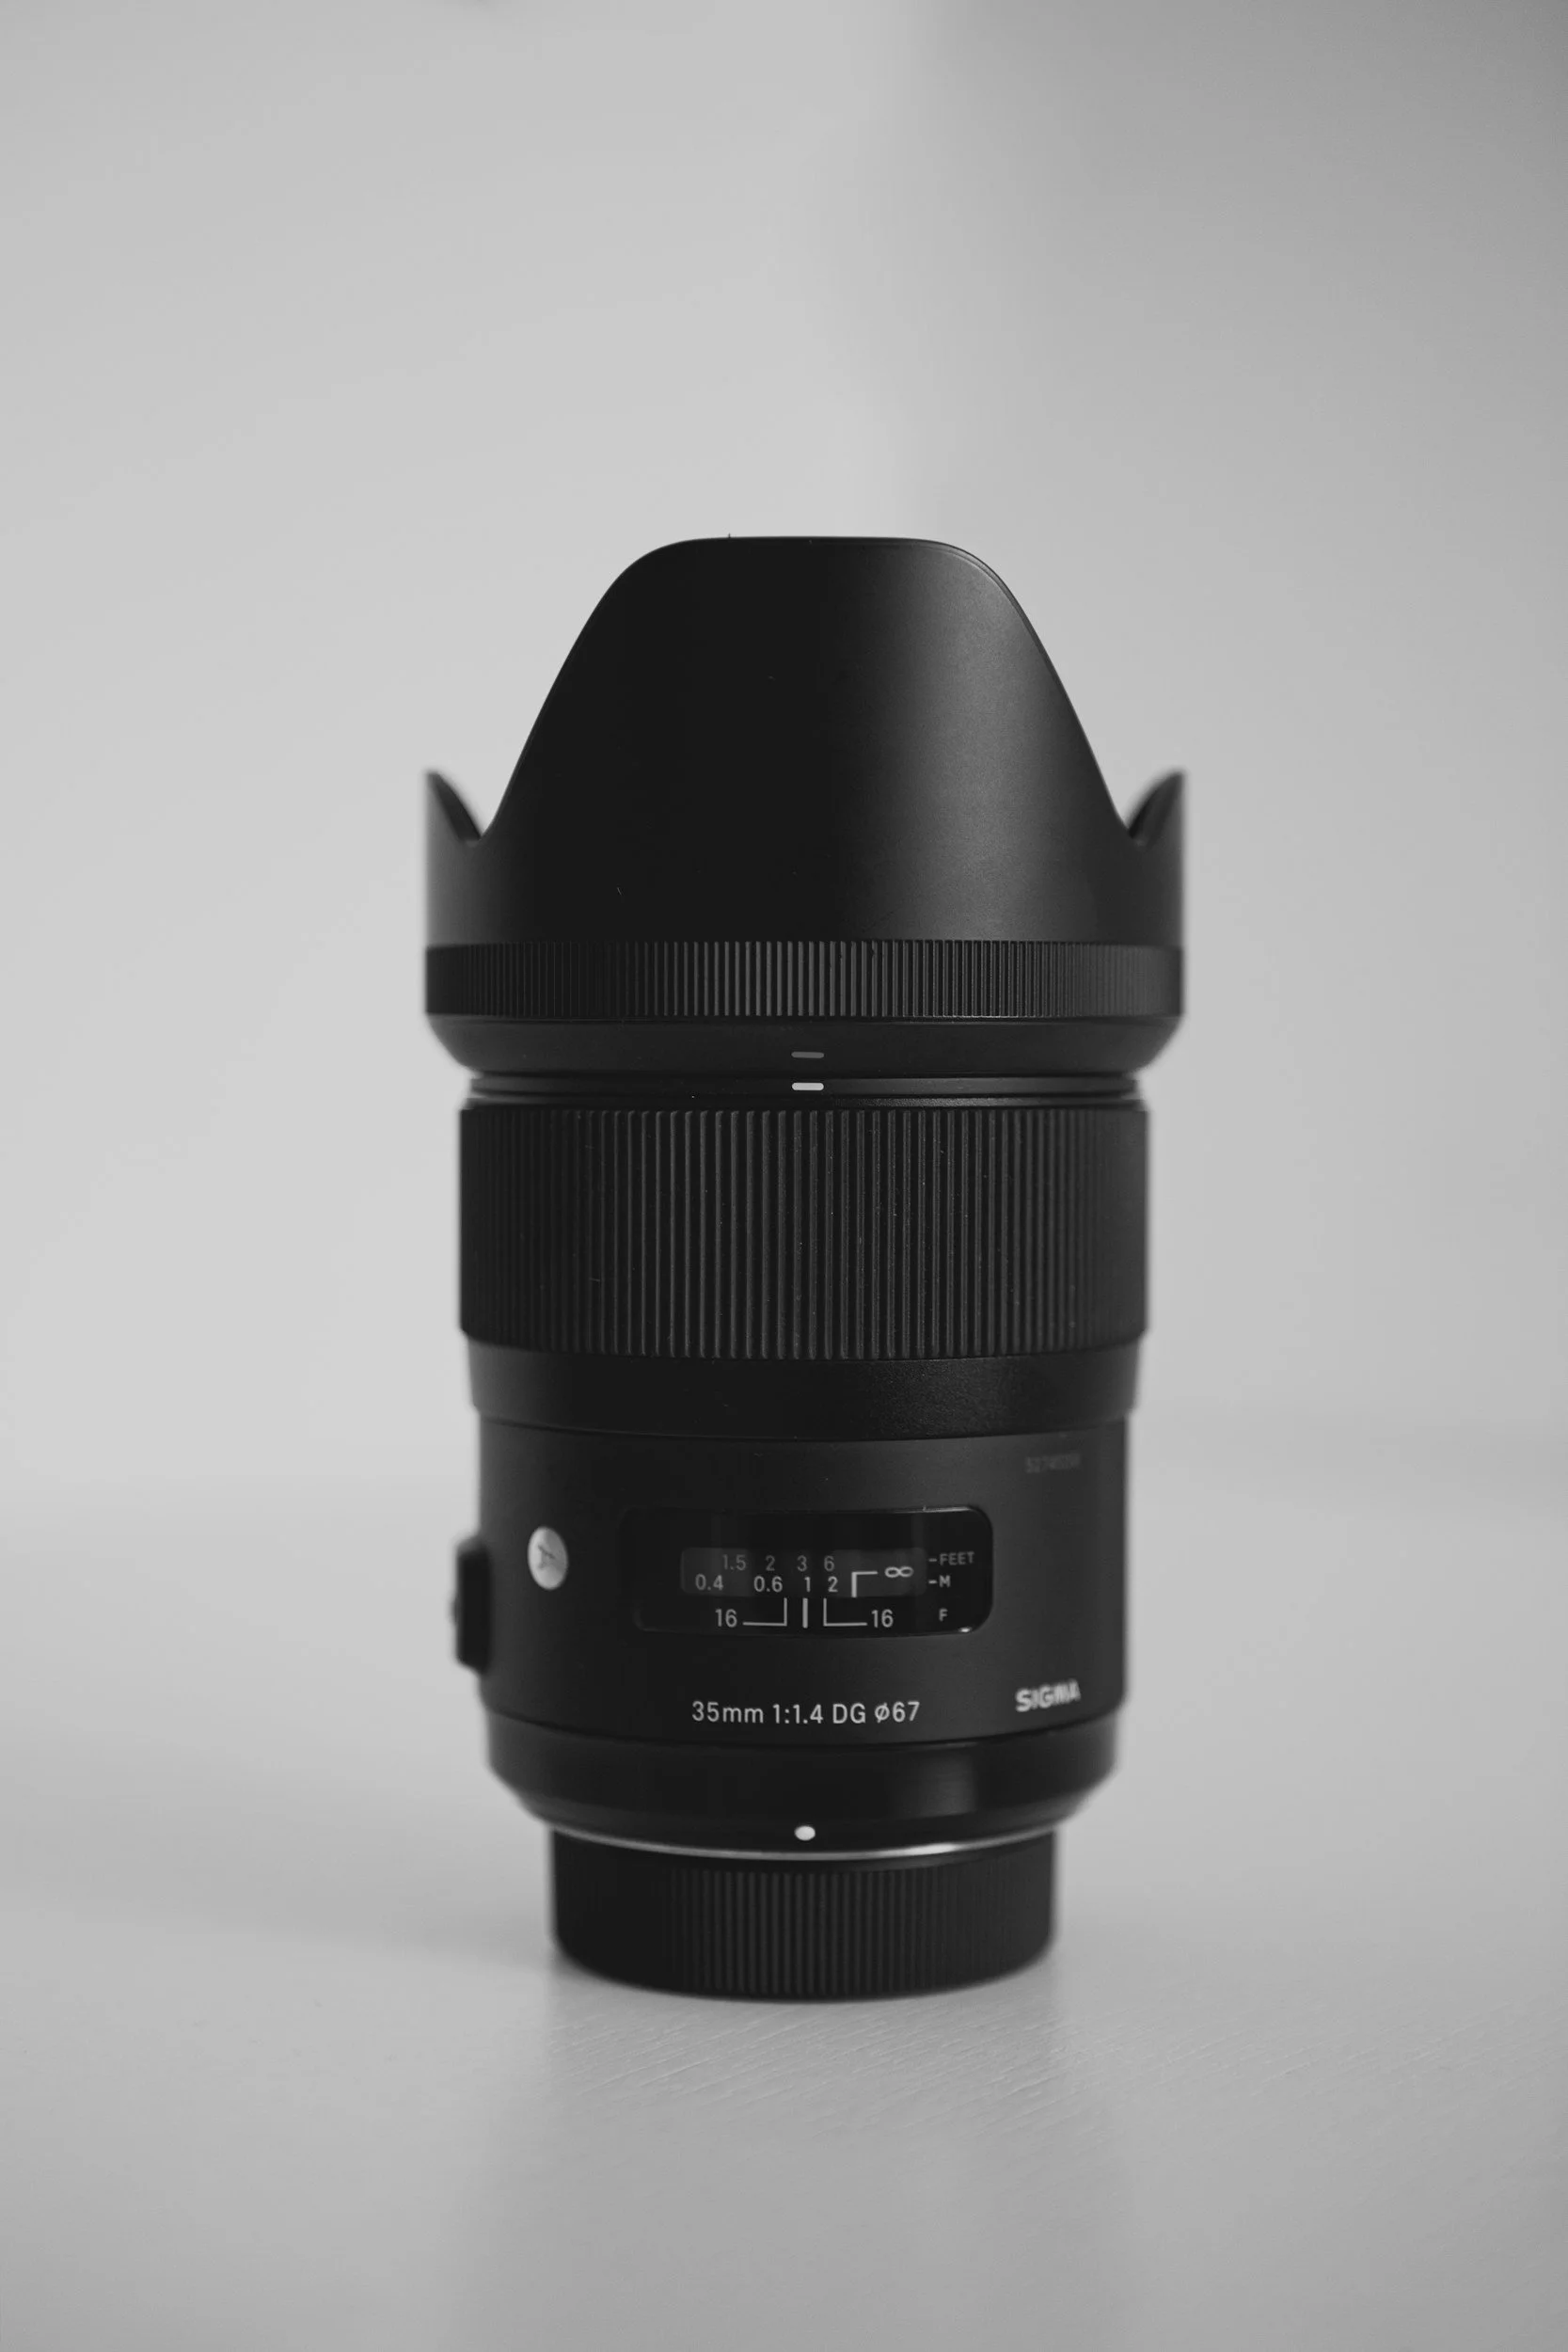
“A fast lens will allow you to achieve a wider aperture and therefore, a shallower depth of field…
Generally, f/2.8 or wider will achieve that dreamy depth of field you’re after.”
Again, as long as you have the vision and skills to achieve that vision, gear becomes one of the least important factors when it comes to photography.
However, I have to admit that having a faster lens will help you achieve that dreamy look and get results you wouldn’t be able to get with, for example, a stock lens.
Personally, I used a Sigma 18-50mm f/2.8 paired with my Sony A6700 (APS-C) for this shoot. My personal recommendation would be to use a faster prime lens, like a 35mm or 50mm at either f/1.8 or f/1.4, however you may prefer to use a zoom lens if you want the versatility of focal lengths.
Having a faster lens will also allow you to shoot in more difficult lighting conditions, as you can open up your lens to let more light in compared to a slower lens.
Lens Filters (ND, Bloom, Starburst, Polarizers, etc)
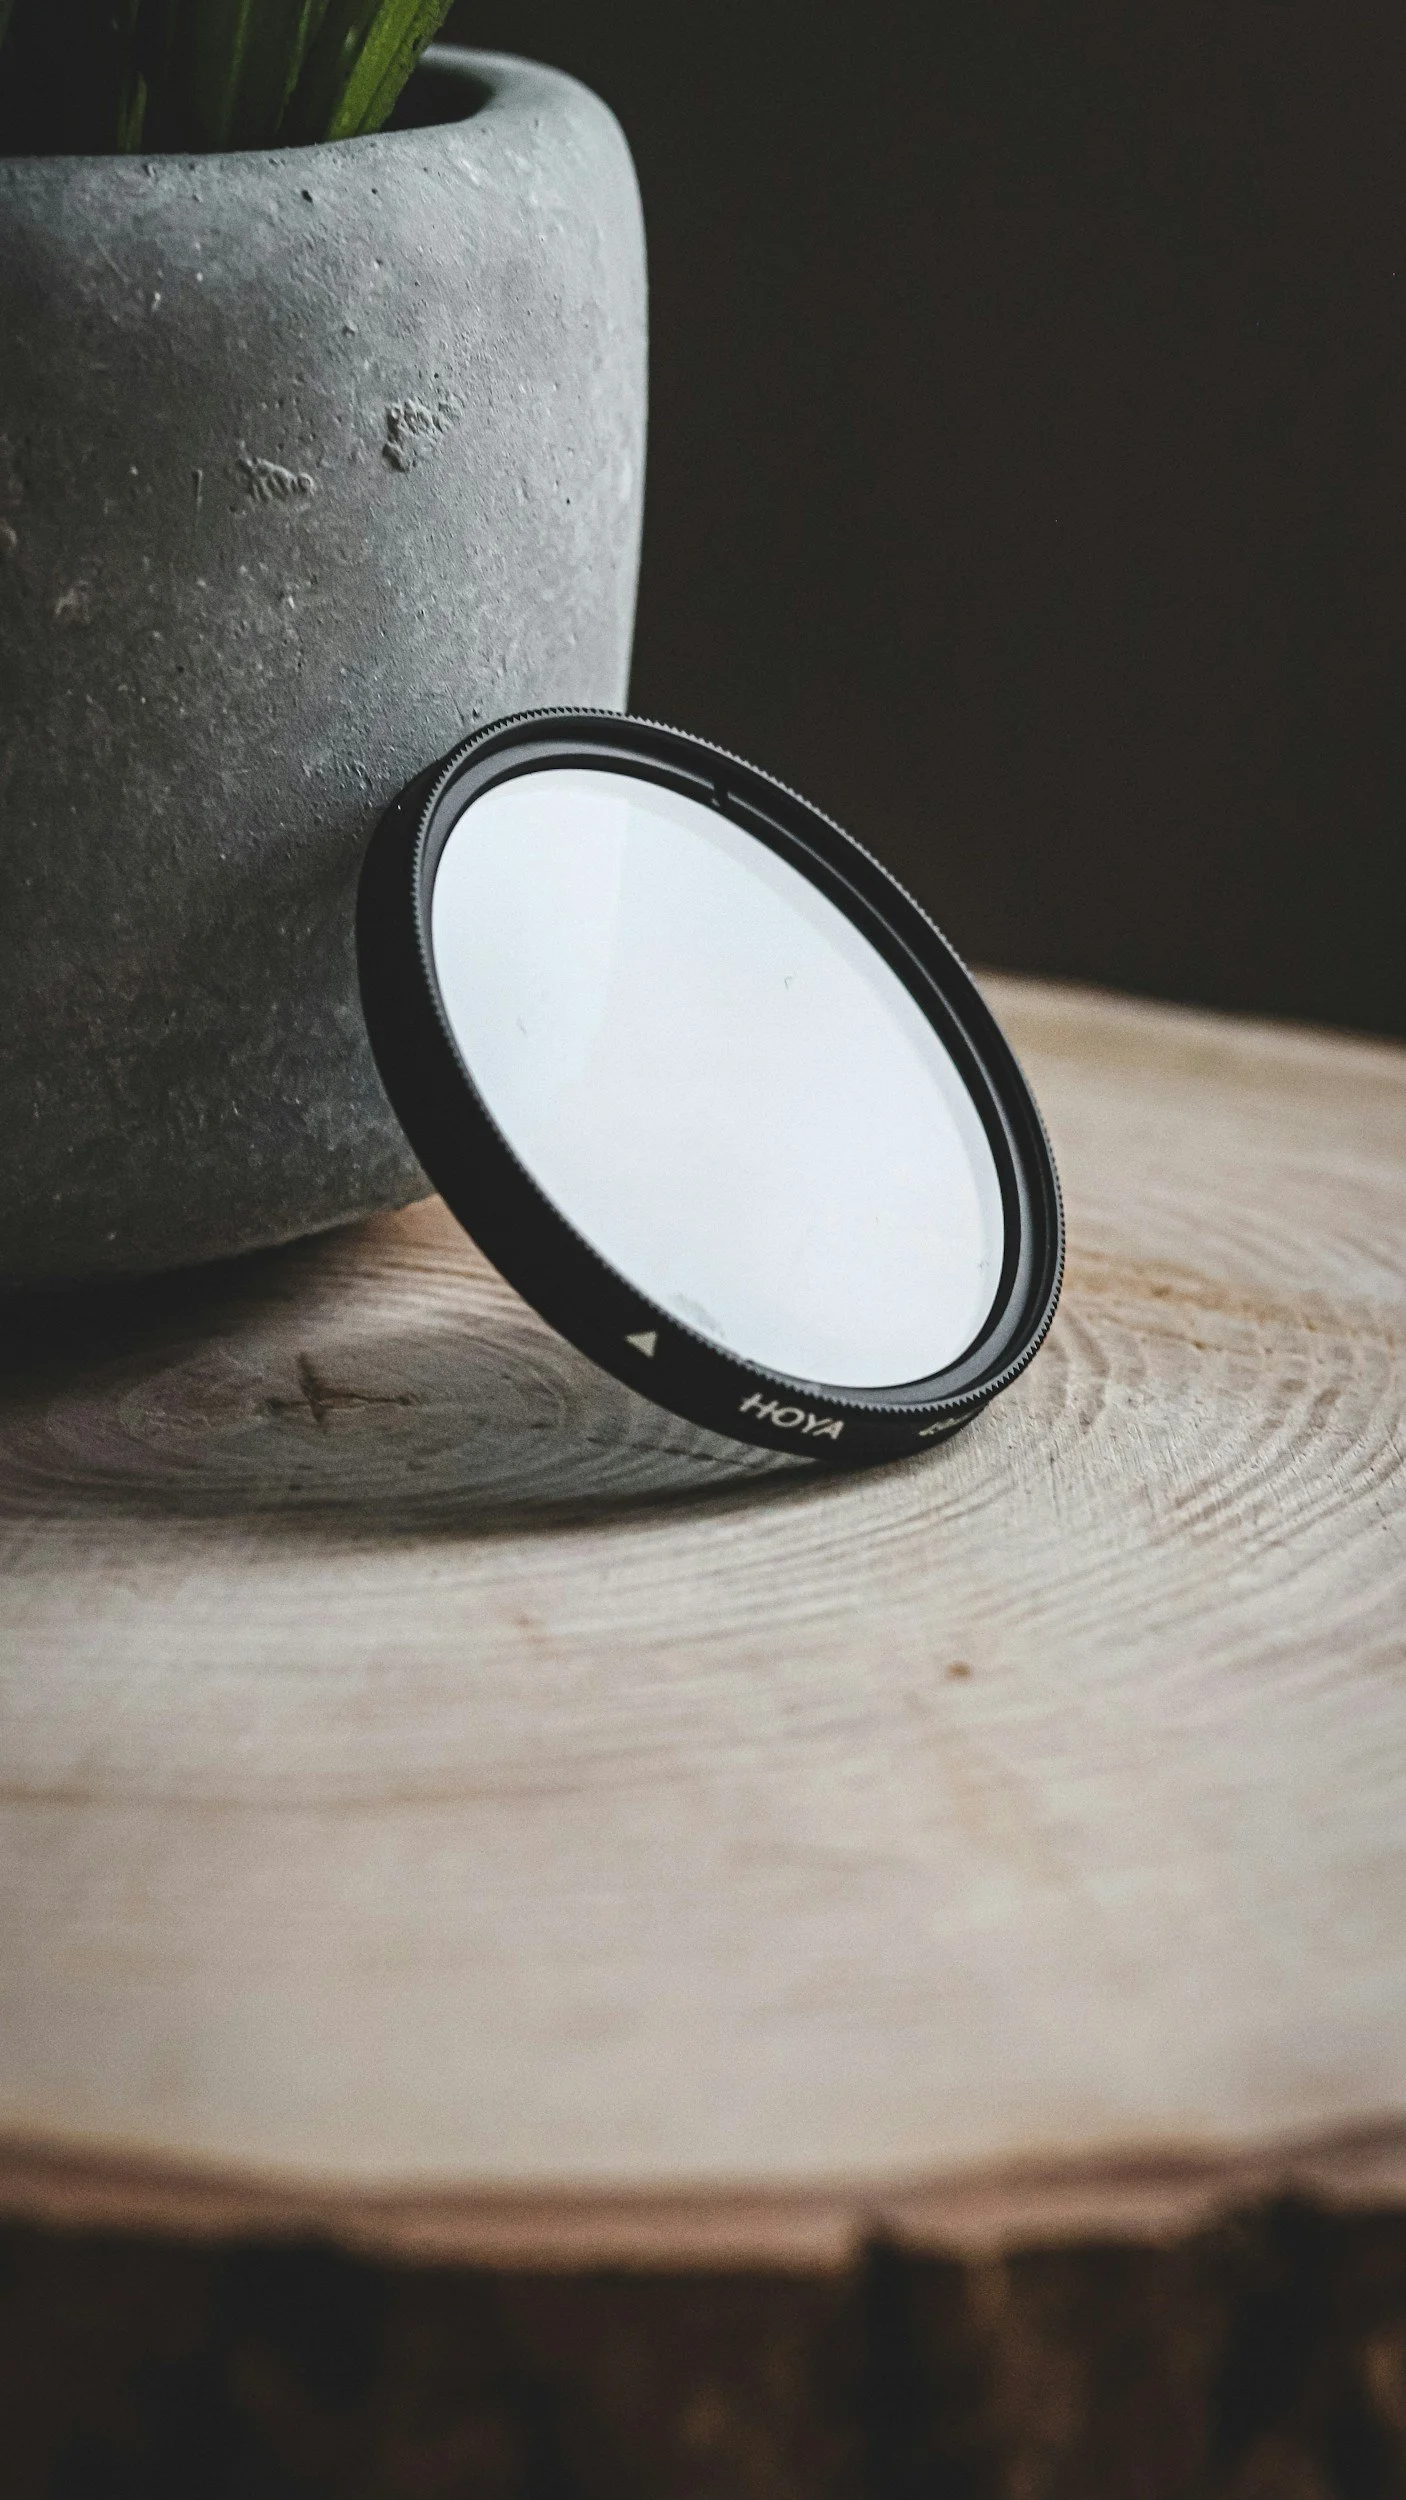
“Lens filters can help you achieve creative effects while keeping creative settings such as aperture and shutter speed…
Neutral Density (ND), Bloom, Starburst, Polarizers. These are all great filter examples for dreamy photos.”
Remember how I mentioned that having a slow shutter speed and wider aperture will allow you to achieve dreamy photos? There’s just one problem.
Overexposure.
With a slow shutter speed combined with a wide aperture, you might end up overexposing your image with enough light of a small sun.
In order to prevent this and keep our settings, we need to use camera filters. Specifically, I used a neutral density filter also known as a ND filter.
By using a ND filter, I’m able to keep a wide aperture and slow shutter speed without overexposing my image. This helps keep as much data in the final photo for post production as well as our creative intentions.
Other filter recommendations I can make for dreamy photos include bloom filters, which add a layer of diffusion to light sources; softening light sources. Starburst filters and polarizers are another set of lens filters that you can use to add creative effects to your image.
3. Lighting
Golden hour during sunrise, approximately 6:15am at Mount Maunganui, Tauranga (NZ).
Lighting is the most important factor when it comes to dreamy photos. Period.
Think about it; without light, you have no image. Without the right light, you end up with an image that looks far from ideal.
Understanding light is the most important factor that will determine the quality of your images. So let’s talk about some simple lighting techniques to get dreamy photos.
Before we begin…
For the sake of simplicity, I will only be talking about natural light in this post. You can of course, setup your own artificial lights to achieve a dreamy image. Don’t worry, you’ll still be able to apply some of the concepts about natural lighting to artificial lighting setups.
Let’s start with one of the key factors about lighting; timing.
Time of day

As a photographer, the time of day will drastically change the lighting conditions and therefore, the final image.
Most people will tell you to shoot during “Golden Hour” if you want dreamy images, however, that isn’t a hard set rule. You can still achieve dreamy photos under harsh daylight. However you have to be intentional with your lighting, and that comes from an understanding of when you should be out photographing.
When planning out your concept, take note of the kind of light that you want to be photographing under. Do you want the harsh light of midday? Perhaps the diffused light of a cloudy afternoon? Golden hour? Blue hour? It all depends on what you’re after.
After deciding on what kind of light you’re after, you should understand when that specific lighting condition will occur at your desired location.
My advice is to take a couple of location scouting visits; intentional visits to your location at different times of the day to understand the lighting. From there, you can be better prepared on how a scene will look under different lighting conditions.
It’s useful knowing when you want to be photographing. But what happens when you’re actually out shooting? What lighting techniques can you use to achieve the best lighting for “dreamy” photos?
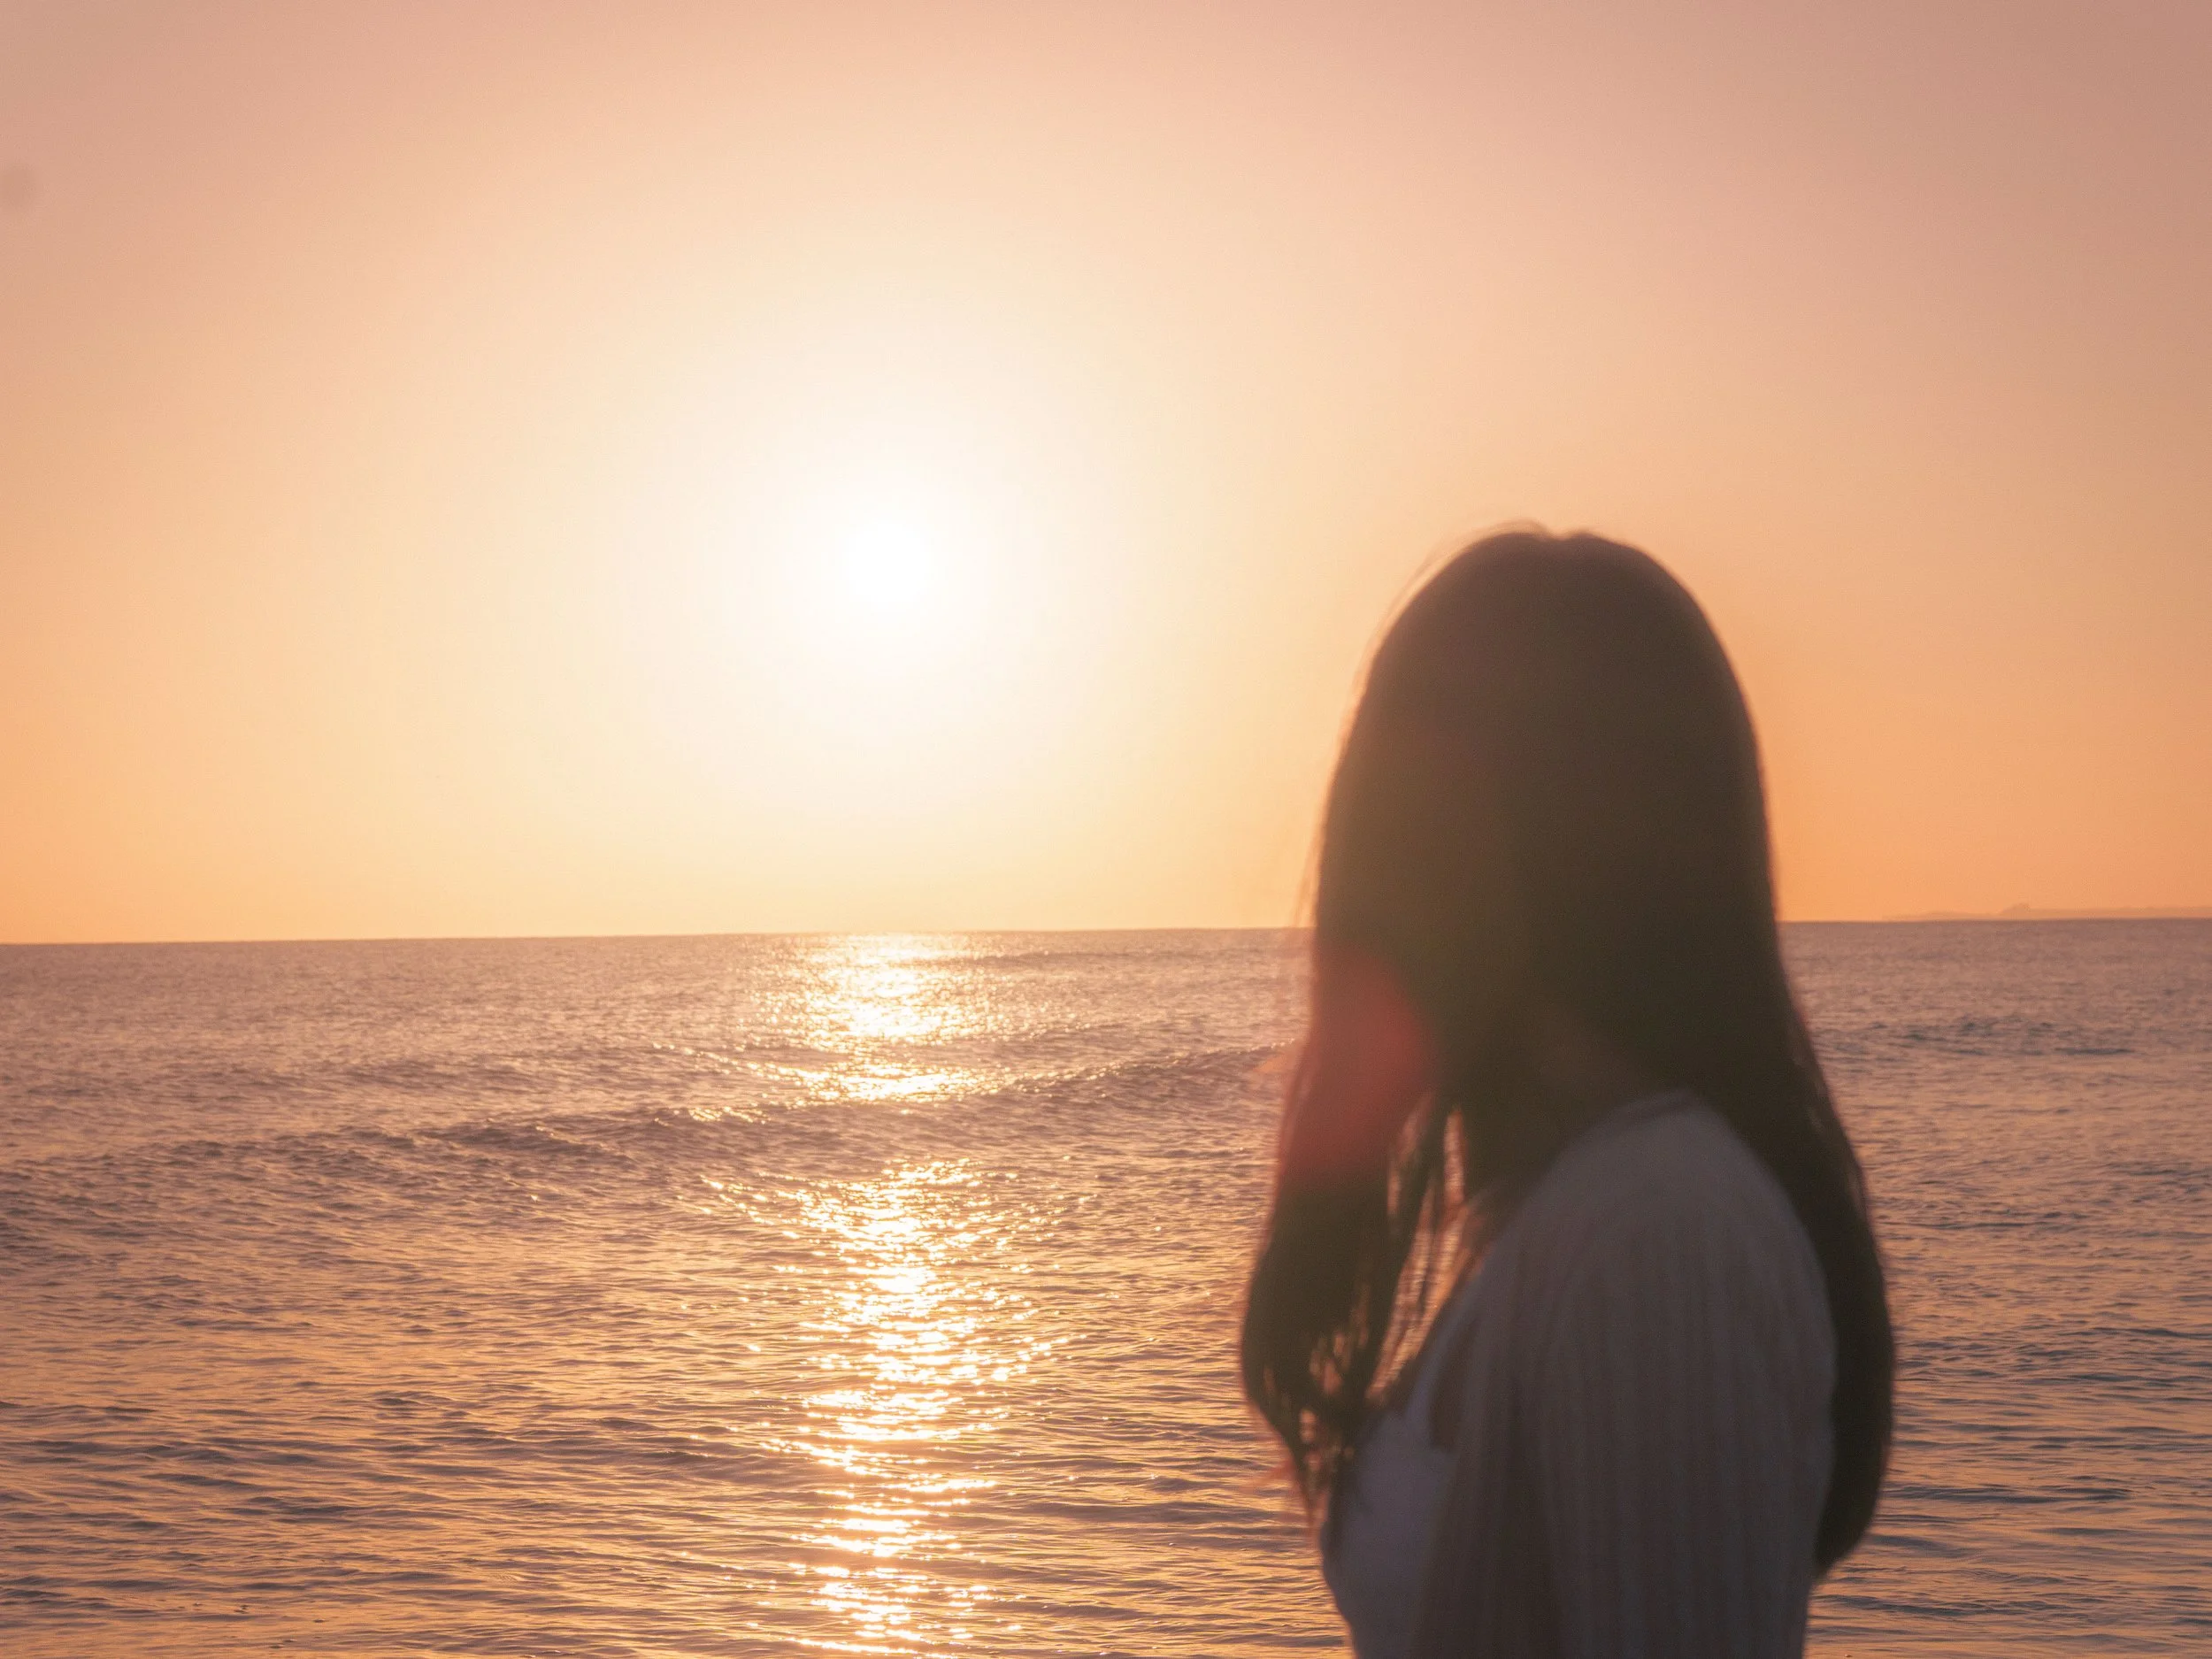
Backlighting

One of my favourite techniques for dreamy photos: backlighting.
What is backlighting?
“Backlighting is the process of illuminating the subject from the back.”
Pretty self explanatory. But why might you use backlighting?
Backlighting has a pretty cool effect. It creates a “silhouette”.
Silhouettes outline the shape of your subject. This typically leads to the details of your subject being in the shadows.
This silhouetting effect does two things:
1. It creates a sense of mystery.
2. It emphasizes the shape of a subject rather than the fine details.
With this in mind, you can start to see how backlighting can be used for your dreamy photographs. Having a series of silhouette shots can lead the viewer to become more interested about the subject at hand.
Backlit photos work well as introductory shots for a series of photos, as they introduce your subject without revealing everything straight away.
In practice, this means placing your light source behind your subject. In my example, the sun is rising above the horizon of the ocean, so I positioned Stephanie so that the sun is behind her, creating this effect.

A backlighting example, using the reflection of the water as a light source.
When applying the backlighting technique, note that the light doesn’t have to come straight from the source. You can utilize reflections as a source of backlighting for your subject.
Another cool thing to note about backlighting is that it creates an “edge light” which illuminates the edges of your subject.
This can create an “ethereal” look and helps with the dreamy aesthetic.
2. Shooting Shadow Side

Shooting on the shadow side to create depth.
Another technique that I like to implement is known as “shooting on the shadow side”. What does that mean?
Shooting shadow side means taking the photo from the side that the shadow is on. This is a common technique in cinema, but why use it?
One word. Depth.
Shooting photos on the shadow side of the subject provides contrast and therefore depth, which helps make your photos look more cinematic and interesting.